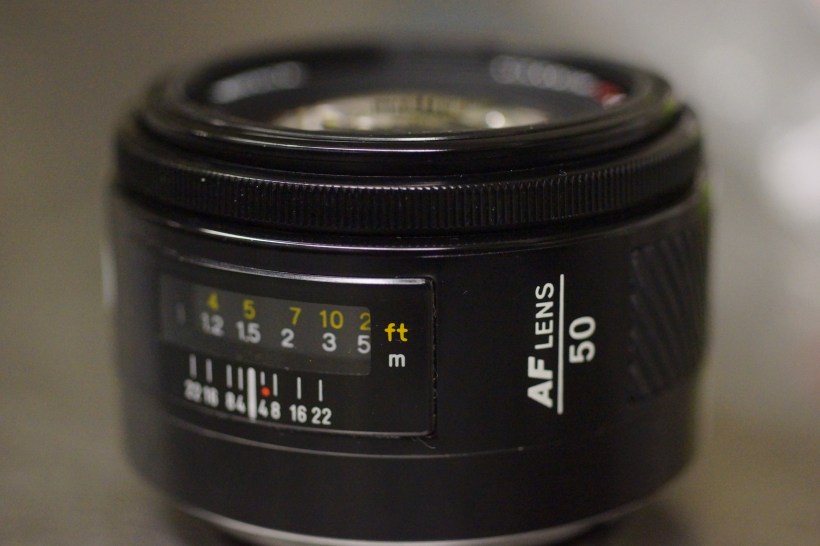
The first thing someone usually tells you upon purchasing your first DSLR, is to ditch the kit zoom lens and get yourself a prime. In the Sony universe, most will recommend the Minolta 50mm 1.7. It’s a great lens, built solidly, and performs sharply. It also can be had for roughly $80. I’ve owned one, then sold it, then searched for it again. I went a different route, spend a few more bucks and obtained the f1.4 version of Minolta’s standard lens. Here’s why:
-on the a77, light is important and I could use the extra third stop
-as far as bokeh on a crop sensor behavior is more like the full frame equivalent of 2.1 vs 2.55, rather than 1.4 vs 1.7.
-sharper overall at wider apertures
-Sony equivalent is twice as much as the Minolta
They are both great choices as short tele-portrait lens (remember 50mm on an aps-c is really 75mm) and are built from an era of durability. They are also really small compared to other brands since the focus motor is screw driven and doesn’t require a mechanism in the lens body. So they are truly pocketable. The manual focus ring is tiny however, and though the rotation is smooth on the copies I’ve had, it really was designed for autofocus. An autofocus that is loud but quick on the a77.
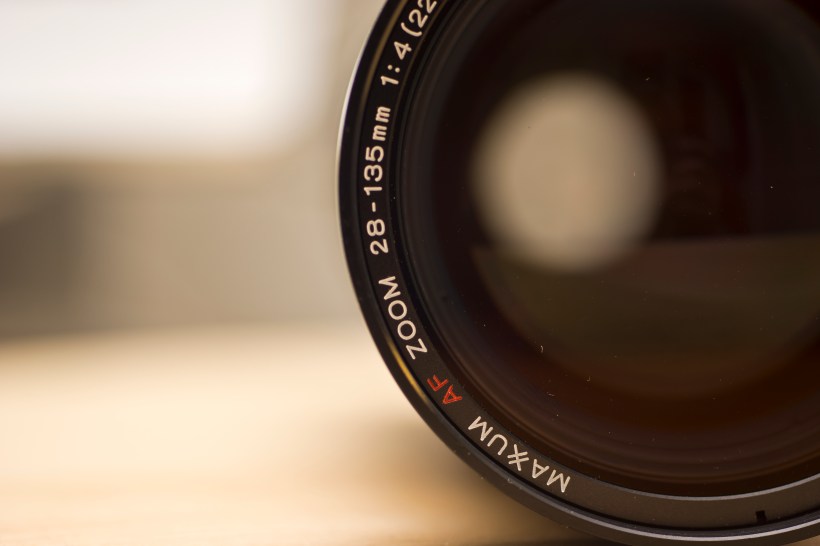
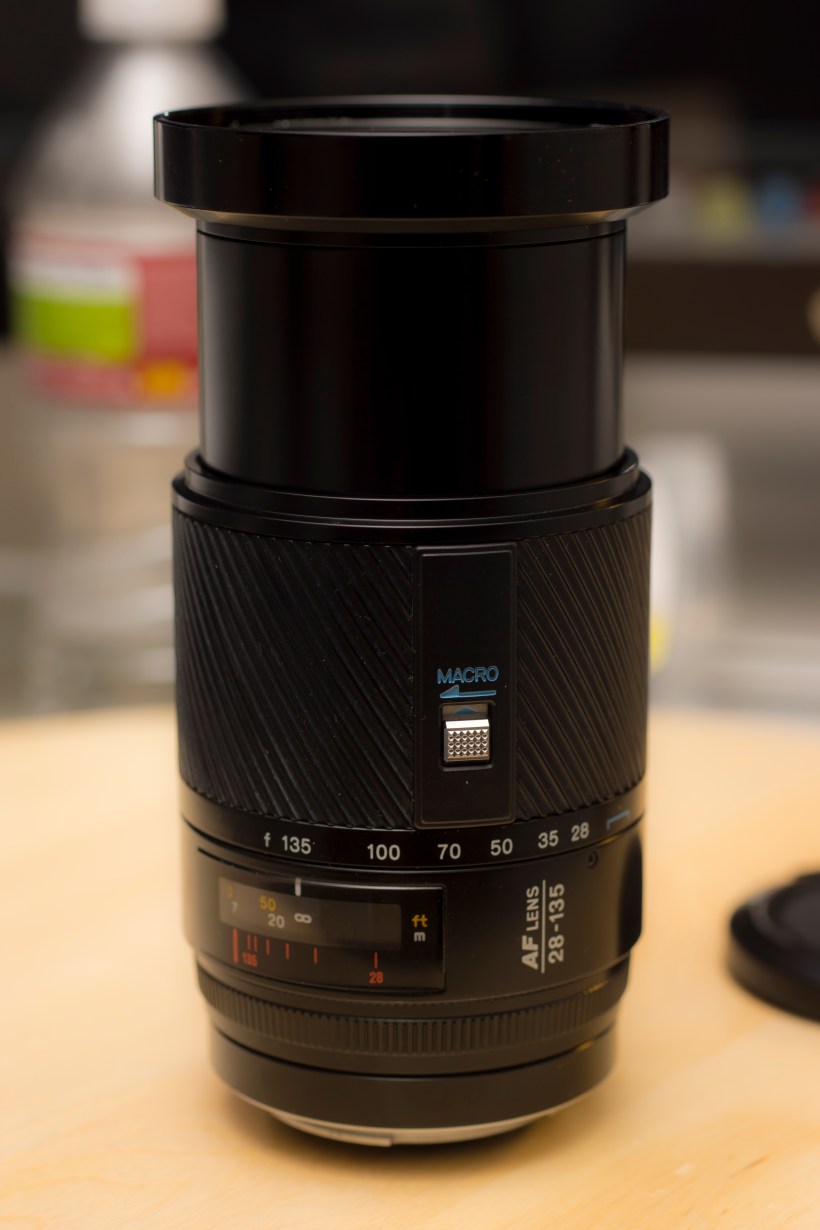
It has it’s drawbacks. 28mm is not wide enough and f4-4.5 is not fast enough, especially on a crop sensor, for general purpose. The minimum focusing distance is also pretty long, but it comes with a nifty macro switch that lets you in pretty close. It’s manual focus only but still comes in handy. I used it for some of the shots in the video that follows. The focus ring feels flimsy and is oddly located in the rear but autofocus is extremely fast on the Sony a77. For full frame or other high megapixel cameras, the resolution and detail it can capture with the right light is amazing. It’s also, like all other Minolta lenses, built like a tank….apart from the focus ring.
and now a video shot with it……making a pot of chili. Lost the footage of tomato puree going into it. blah, blah, blah just watch it.
The Minolta 50mm 2.8 Macro. This oldie doesn’t have a nickname but it doesn’t need to. Here’s what it does have though…1:1 magnification. Many of today’s zoom lenses have the word “macro” written somewhere on the lens. It’s somewhat misleading and in best case scenario gets you as close as 1:4. Moreover much of today’s dedicated macro lenses have a maximum magnification of 1:2. Serious macro photography requires 1:1 magnification.
Closest the Sony 16-50 2.8 SSM can get1:2 magnification1:1 magnification
The most popular focal distance is 100mm. The smaller the focal distance, the closer you must be, which essentially means there is less natural light to work with. This is one reason why the 100mm is usually preferred over the 50. However, if you put a 50mm on an aps-c sized sensor, such as the Sony a77, that gives a FOV equivalent of 75mm. This is a nifty tradeoff since this lens fits in your pocket. Minolta did make a 100mm 2.8 Macro lens that some considered to be THE best macro lens period.
The biggest plus is you can find this lens going on ebay for half the price of either the Sony equivalent, which is the same optically, or the 100mm Macro. As a bonus, the 50mm macro can double up as a medium portrait lens good for 1/4 body shots.
Shot with a Full Frame Canon 5D Mark ii, APS-C Sony A77, and m4/3 Panasonic GH2. If you can’t tell the difference then I’ve spent way too much time mulling over the technical aspects of a camera. Scratch that, I already know I do.
The a57 was a world opener for me. The video I was able to capture was remarkable and got my creative juices flowing. For inspiration I swallowed the addictive drug that is YouTube and Vimeo. I knew I needed more glass (lenses), faster glass (smaller f-stop) and wider glass (16mm or below on the aps-c crop). Sony makes a well-regarded 16 – 50mm f/2.8 lens (through the whole range!) with SSM that goes for $800. This is relatively cheap considering the Zeiss equivalent goes for $2000 and is universally agreed to be on the same level (minus the Sony’s being aps-c specific). Ready to pull the trigger I found that they package this lens with Sony’s high end DSLT, for $1750 at my local camera shop. In essence the $1,400 retail body would cost $950 since I was set on the lens. I put my beloved a57 on Craigslist. Enter the Sony a77.
On the surface I thought this would be a clear cut upgrade and there would be no remorse changing cameras. I get 24.3 megapixels over 16.1 (I know I said it didn’t matter but the option to do huge prints is nice), a three-hinged articulating screen over the a57’s troublesome two, oled vs lcd viewfinder, better colors and a weather-sealed magnesium allow body over the plastic one I got used to. I didn’t realize I was going to lose a few things along the way. First I lost light sensitivity. The megapixel crammed a77’s sensor doesn’t fare as well as the a57 in low-light high ISO situations and cannot go above 1600 in video mode. The a57 can do 3200, not great mind you but better than no video. The a57 has a focus magnifier in the digital zoom function that can aid manual focusing in video mode. The a77 does not, but they both have peaking (where focused areas are highlighted in red, white or yellow). It’s also substantially heavier, though good for durability, making long handheld shots a workout. Overall, I still consider the a77 a huge upgrade. Moving on.
I started to unknowingly pixel peep the videos that streamed to me from Vimeo. I compared them to the raw footage from my new a77 and wondered why I wasn’t seeing the same quality. I was semi-obsessed with how the Canon 7d (most relative price and build quality-wise to the Sony) had such clear images let alone the $500-700 range Rebel t2i, t3i, & t4i line. Let’s not get started on the hacked Panasonic GH2 which produces a $10k sharp image. I know you can take an iPhone and produce some excellent video. It’s up to the framing and story telling to make motion pictures captivating but I needed to know why my highly rated a77 wasn’t delivering the goods. I dug a little deeper.
It’s in the codec. Sony created the AVCHD standard tp avoid paying h.264 royalties to Apple. While the 2.0 version is highly efficient, the 4:2:0 and 24 mbps bitrate (4:2:2 in the Canons and upto 170mbps in a hacked GH2) doesn’t hold up well to color grading. Things can fall apart if pushed too far. The codec also macro blocks (creates large blocky screen artifacts) in blues and exposed blacks. Video is softer than the Canons and retains less detail than the GH2 as a result of downsampling that monstrous 24.3 megapixel sensor to 2mp (or 1080p). I started to get depressed at my investment.
Then I realized something about all the videos I was watching. Canon’s DSLRs have been out for about 3 years and Panasonic had the hack on the GH1 which came out two years ago. Professionals have been using these cameras. That means they had the right setup, knowhow and equipment (lighting is huge). The launch of the Sony a77 in August 2011 was hugely affected by the floods in Thailand and they didn’t become readily available until early this year. So all the videos out there were enthusiast-level but hardly professional studio filming. Upon further investigation, searching for raw video test footage from amateurs on the Canon Rebels-T3i yielded the same quality footage I was seeing out of my a77. I was a Sony enthusiast once more. This was a challenge.
Thanks to the Alpha SLT shooters across Vimeo and the people over at EOSHD I learned a few things. One was to shoot in Sunset mode with manual white balance (important otherwise the reds will be pushed). Sunset mode creates smoother gradients and exhibits less artifacts. TURN DRO OFF. Sony’s dynamic range optimizer is on by default and though it brings up shadows, it’s artifact happy. Try and get the picture the way you want it in camera and don’t rely on heavy fixes in post. I like to keep sharpness at 0 with whatever picture profile I shoot. -3 is the standard but the a77 is softer than the Canon’s and +3 yielded choppy aliasing. (after further testing I’d suggest -3 sharpness). If you’re shooting in auto set the max ISO to 800. If you’re shooting in 1080 60p and want to use autofocus, point to different lighting sources and toggle the ael button on when you 1/125 shutter speed. Rule of the thumb is to double the frame rate. So a 24p rate should have a 1/48 shutter speed. On a DSLR/SLT 1/50 and 1/125 are the closest you can get for 24p/60p respectively for the most eye-friendly motion. Combat low light with fast glass not higher ISO but you knew that. I use an old photoshop trick to get cleaner images by overlaying a copy of the video and setting opacity to 50% with a slight Gaussian blur in Final Cut Pro X. It gets better.
If you’re a Sony shooter and were wondering about the video, be happy. First off, I’m pixel peeping on a Retina Macbook display and all faults are null and void when outputting to a tv or projected. We have a lot things that other cameras don’t currently. In body electronic stabilization for video works great negating the need for expensive IS glass. Cheaper lenses, money saved. Although it crops part of the video image to give it room to stabilize it, you still get aps-c sized depth of field. 60 progressive frames at the full 1080p resolution means super clean slow motion. It’s as easy as dropping the footage in a 24p timeline and conforming the speed. No need for Twixtor, money saved. That translucent mirror that blocks a third of the light, giving us the high ISO problems, enables us to see what we’re filming through the OLED. No need to glue a view finder onto the lcd screen, money saved. The way the lcd screen articulates and focus peaking means you don’t need a separate monitor. Money saved. Now the Audio Gain Control is a nuisance but it does work well and the on board stereo mic is not bad for B or ambient audio. The SSM in the kit lens designates it as fast and silent. The AGC surprisingly doesn’t pick up the sounds this lens makes under normal conditions. I also find that if you yell (it’s silly) into the mic when you first hit record, it pushes the AGC down creating a better floor level. Combine that with the fast Alpha SLT-only phase detect auto focusing and it’s a great run-n-gun/sports event camera. The AVCHD 2.0 codec is efficient and you’ll probably end up spending less in SD cards and hard drives if you record a lot. The GH2 and Canon’s Full Frame Mark iii still provide better video but one requires hacking, the other costs three grand body-only. In the end, composition and framing will do a lot more for video than the tech behind it.
ISO 6400 1/13 f2.8 50mmHand Held Twilight Mode: ISO 6400 1/10 f2.8 50mm
I’ve been shooting with the Sony a77 recently and, as expected, it’s low light performance is not great. The Sony a57, which costs half as much, outperforms Sony’s flagship a77 at noise sensitivity in low light. This is mostly due to the fact that it’s sensor is less cramped with megapixels (16.1 for the a57 vs. 24.3 in the a77) so you can add that to the mega pixel myth.
There is a workaround found in the a77 and the camera’s in Sony’s SLT line. It’s hand held twilight mode. You can find it as one of the scene options on the large dial. My first thought was that these options were nothing more than toyish features to be seldom used, but the hand held twilight mode was surprisingly useful. What it does is take 6 rapid pictures in succession and stacks them together to create a single image. You can also activate this in PASM modes by selecting Multiframe Noise Reduction which will do the same thing at your selected ISO.
As a side note, I’ve upgraded the firmware on the a77 to version 1.05 and can confirm that the dials and power on/off are much faster. There is zero lag switching shutter and aperture controls and hardly any delays when looking through the oled evf or activating from sleep. You can find it here. If you’re working on a Mac running Lion, like myself, you’ll have to restart the machine and hold down the 3 and the 2 keys on the keyboard to boot in 32-bit mode after you’ve downloaded the firmware. Once you restart your computer it will boot back into its default 64-bit state.
I was stuck in Palo Alto waiting for an appointment at the Genius Bar. With a couple of hours to kill, I took out my new Sony a57 to see what would happen. I learned a few things along the way …
…the built in mic under most circumstances is useful only as a reference to sync audio recorded from another source
…lots of CMOS wobble in handheld shots
…history lesson – image capturing sensors are either CMOS or CCD. CMOS is regarded as cheaper and arguably superior in taking photographs so it’s found in most DSLRs. Because of the lens selection, which can give a shallow depth of field and natively blur the foreground or background, digital SLRs became a popular choice for restricted budgets as a means of producing high quality film-like movies. the trade off is CMOS sensors have a tendency to make images look warped or rubbery when fast pans are used.
…I didn’t expect this much wobble just walking with it though. It may have to do with Sony’s in body stabilization which suspends the sensor and moves it to counteract hand shakiness.
…hand straps are better than the neck straps that come with cameras
….whenever you think your done recording wait another 10-15 seconds and try and give that same time before hand if your going to do some panning. the extra footage comes in handy for editing especially if transitions are going to be used.
…Sony and Panasonic helped create the AVCHD codec in which their cameras record. It’s pretty advanced and from what I can tell is part of the reason the resulting 28 mpbs avchd .mts files are comparable to a canon that records in 50 mbps .mp4. The downside are the .mts files don’t play well with Final Cut. So don’t drag all the files off the SD card onto a drive. Instead use the import from camera option in Final Cut. Something about keeping them in the camera created folders makes it easier for Final Cut to use the clips otherwise it’ll be an extra unnecessary step converting all the mts files into prores.
… 1080p (progressive) = 1,080 horizontal lines of resolution displayed all together. 1080i (interlaced) = 1,080 horizontal lines of resolution displayed alternately, so in actuality at any given frame your only seeing 540 lines or half of the 1,080 lines that make up that frame.
…1080p at 60 frames per second is not going to happen right now in Final Cut. The clips I shot at that quality were not useable in FCPX and was changed to 24 frames. I haven’t found a work around yet. 1080i at 60 frames works well though. 60 frames a second is desirable if one wants to slow motion things in post. The effect looks smoother since there are frames of information to work with.
…if you want that cinematic film look these are the things i would do to my camera settings. 1) 24 frames per second 2) lower saturation and contrast all the way – it’s easier to color grade in post 3) use a lens with an aperture of 3.5 or below – for that shallow depth of field, blurry goodness effect.
…the huge Microsoft Store is just wrong next to the tiny Apple Store. The huge empty Microsoft store is just right next to the packed tiny Apple Store.
…all of the above only helps to enhance. if there isn’t any thought into the composition or emotions than the greatest camera and editing really only dresses up poop. It’s still going to stink. Because it’s poop.
…I guess dressed up poop can be entertaining sometimes. So here’s some high resolution doo doo.
I can’t remember the first camera I operated but I think it was a Kodak disposable. The first piece of equipment I chose was a Panasonic Mini Dv camcorder that took 1.3 megapixel stills. I started getting excited when my cell phone options began to include image taking capabilities and I made sure I got the iPod Touch 4th gen (the first with a camera) when it came out so I could start capturing pictures and video. The iPod stills weren’t that bad until I found out they didn’t even qualify as one megapixel.
I didn’t pay much attention into what effect a megapixel has on an image until I knew my equipment was deficient. I planned on nabbing an iPhone 4 because I heard that it packed a pretty decent 5 megapixel camera. I was all set and ready to go. It turns out my pictures still seemed somewhat dissatisfying to me. I began looking into a point and shoot pocket sized camera and wondered why anyone would buy one when smart phones could do the same thing. The same thing crossed my mind when I saw Costco stocking super zooms and DSLRs. I didn’t the slight increase in image quality was worth carrying all those lenses and that meaty body. My assumptions were obviously all wrong.
The Mega-Pixel Myth…..ever heard of it? It basically states that anything above 5 megapixels yields photo print quality and the human eye will not easily distinguish the resolution differences. So all those camera ads touting the newest camera punching an extra 2 megapixels actually adds no discernible difference in quality.
Life is about options and the iPhone didn’t give me much. It’s in phone camera app gave me a focus lock, HDR, and that’s pretty much it. Even third party apps that added exposure locks lacked any serious control over basic settings that most pocketable point and shoots came standard with.
My phone did offer zoom though. I thought that was great until I actually used it and wondered why it turned out such shitty images. Turns out the iPhone and other forms of digital zooms relied on a processor to guesstimate what the image would look like closer. Many dedicated pocket cameras and all those Costco super zooms had optical zooms that didn’t require guessing because the actual lenses where at play here not some program.
The biggest problem I had was where I was taking these photographs. Outdoors I could usually produce some decent shots but indoors or at night time these images would become saturated in graininess. DSLRs had the large sensors that are roughly the size of a stamp versus the ibuprofen sized sensors found in pocket friendly cameras. These large sensors were more receptive to low light conditions. They also had many setting options like aperture (controlling how much light passes through the lens), shutter speed (which also affects light entering the sensor once the shutter button is pressed), and ISO sensitivity. I could also select what kind of lighting situation Im under, change white balance (no more orange tinged indoor shots) and the biggest selling point of a DSLR, the type of lenses I could use. Telephoto, 50mm, wide angle, and macro are just a few of the many available lenses that suit all sorts of situations while providing a nice shallow depth of field. These lenses more than megapixels are what produce sharper images.
So I went out and bought a used Sony a300 knowing all of the above and happily new I was going to be able to capture beautiful photos. Then I got caught up in one article after another and started getting bother that my first DSLR only had 10.2 megapixels. I had pixel envy at the newer Canons and Nikons that sport 16, 18 and 20 plus MP. I took my time and pounced when I saw a deal on a brand spanking new Sony a57 sporting a whopping 16.1 megapixels. I popped on my favorite Minolta 50mm f1.7 lens and snapped some pics. I opened Aperture on my Mac and was surprised that I wasn’t blown away. I took my old a300 and took the same shot with the same lens and settings and remembered, the Mega Pixel Myth. See for yourself.
Composition and creativity do more for a photograph than the density capabilities of a camera. Check out the cheap camera challenges of pro photographers at Digital Rev. At the end of the day, I was part right in getting excited over my iPhone. It’s a device that I need to have and Chase Jarvis made famous the saying “the best camera is the one that’s with you.” With the amount of money I’ve spent though, I’m making sure I take my a57 everywhere, including bed. Good night.
Sony Alpha a300 on the left vs. Sony Alpha SLT-a57 on the right
Sony a300 10.1 megapixelsSony a57, 16.1 megapixelsSony a300 10.1 megapixels
RAW images were all shot during the daytime with ample light. JPEG images were taken in fairly lowlight conditions.Lens used was an old Minolta 50mm prime.
JPEG ISO 400 50mm f15.6 1/8JPEG ISO 400 50mm f1.7 1/100JPEG ISO 400 50mm f1.7 1/80RAW ISO 100 50mm f6.3 1/500RAW ISO 100 50mm f5.6 1/200RAW ISO 100 50mm f4.5 1/8RAW ISO 100 50mm f3.2 1/320RAW ISO 100 50mm f1.7 1/250JPEG 2X CLEAR ZOOM ISO 100 50mm f1.7 1/250